Products
Solutions
Resources
9977 N 90th Street, Suite 250 Scottsdale, AZ 85258 | 1-800-637-7496
© 2024 InEight, Inc. All Rights Reserved | Privacy Statement | Terms of Service | Cookie Policy | Do not sell/share my information

At any time, you can print a report of the data in the currently displayed register using the Print or Preview option available from the Actions tab for the register you are in.
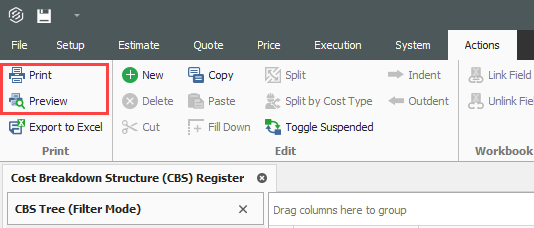
The data that prints is the data currently displayed on the register form. The report will print whatever columns are displayed on the register; if you have customized the display in the register, the report prints that data. In other words, register reports are entirely customizable.
By creating Saved Views, you can report the data on a register form in several different variations.
The following step by step example will walk you through creating a custom register report on resource utilization and saving it as a Saved View.
Open the Training Job and select Setup tab, then select the Resource Rates drop-down list.

From the drop-down list, select Labor.
From your Saved Views drop down menu on the Resource Rate Register, select the Print View for Summary view.
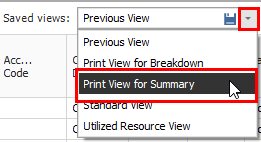
Notice this view includes utilization hours
Right-click on a column header and select Column Chooser.

From the Customization window, drag-and-drop the Minority Percent, Unique Sales Tax, (Scale 2), and Maint. Man-Hour Factor columns into the register.
Close the Customize window.
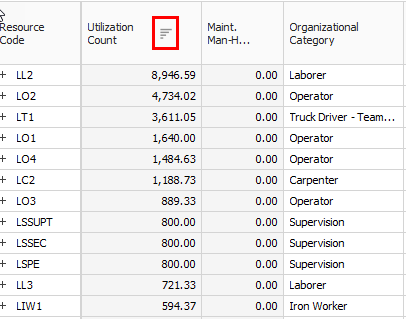
Sort the Utilization Count column by clicking on the column header twice so that you see the bars descending.
This sorts your items so the most utilized resources are at the top
Click on the Saved Views drop-down menu and select the Save disc icon to save the view.
Name the view Labor Utilization View, and then click OK to save the customized view.
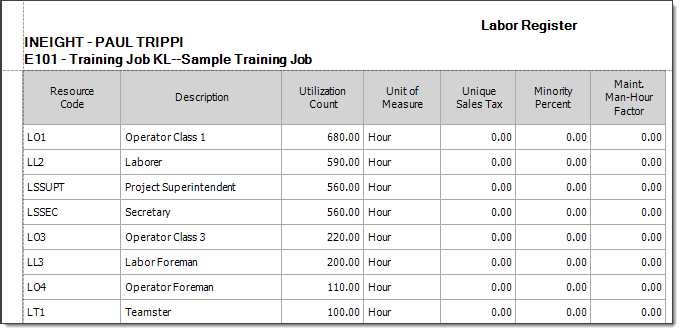
From the Actions menu, select Preview to review the report before printing.
Within the Preview for a register report, there are several options to choose from to configure the output of your report.
While in the Preview mode, selecting File > Page Setup provides setup options for the page format:
Page Size (legal, letter, etc.)
Paper Width & Height
Orientation (portrait or landscape)
Page Margins (left, right, top, bottom)
Using the Export function allows you to identify a Print range, Image quality, Password Security, and more. Selecting File > Export Document prints an Adobe Acrobat (*.pdf) report.
Additional Information
9977 N 90th Street, Suite 250 Scottsdale, AZ 85258 | 1-800-637-7496
© 2024 InEight, Inc. All Rights Reserved | Privacy Statement | Terms of Service | Cookie Policy | Do not sell/share my information